Computers function in a world of zeros and ones, on and off, and black and white. But in the real world, things are rarely that simple. For example, you may prefer your phone to operate at less than 100% brightness. And fully mashing―then releasing―your car's gas pedal is a very inefficient way to drive. To produce a more subtle behavior (e.g., 60% lighting or 20% gas pedal), computers need some way to convert those zeros and ones into an approximation of a linear curve.
Approximating PWM Analog Output Using an R-2R DAC
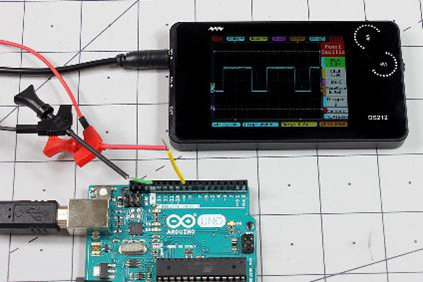
Image: Jeremy S. Cook
The simplest way to achieve that linear curve is to use a method called pulse-width modulation (PWM). As outlined in my PID Controller Basics post, PWM means that your board sends a series of pulses of varying lengths to a specified output, which averages out to a specific value. PWM is ideal for controlling simple applications like LED lighting and motors.
However, PWM is still a square wave, which means it isn’t appropriate for all applications. In some situations, I recommend another option: the resistor ladder-based digital-to-analog converter (DAC). This component can output voltages in discreet levels that are dictated by a DAC's resolution in bits. Consider the DAC's bits the number of "rungs" on its resistor ladder.
Arduino DAC R-2R Ladders
If you want DAC functionality using an R-2R ladder then the good news is advanced boards like the Arduino Due and the newer MKR series have that capability built in. The Due features two DAC outputs and MKR series boards have one. Resolution varies between boards and software configurations, which we addressed in more detail for the Arduino. On the other hand, more familiar boards—like the Uno and most of the Nano series—don't feature this capability. If you want more than one or two true analog outputs, you'll need a separate DAC module.
Make Your Own DIY R-2R Ladder DAC
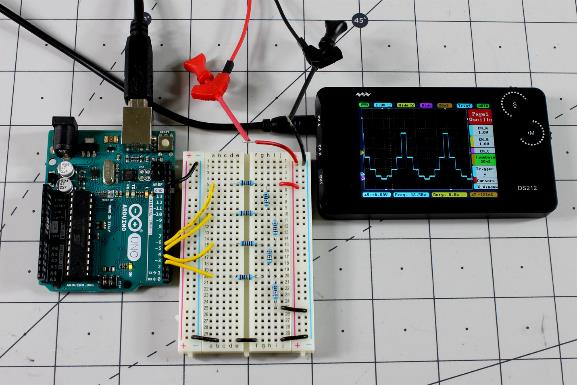
Making your own DAC R-2R ladder isn't the most expedient way to add analog capabilities to a microcontroller, but consider it if you want to learn how these devices work. In this setup, outputs from the Arduino connect to a voltage divider network—made up of resistor values of either R or two times R, thus the name R-2R—creating voltages between zero and nearly the input value.
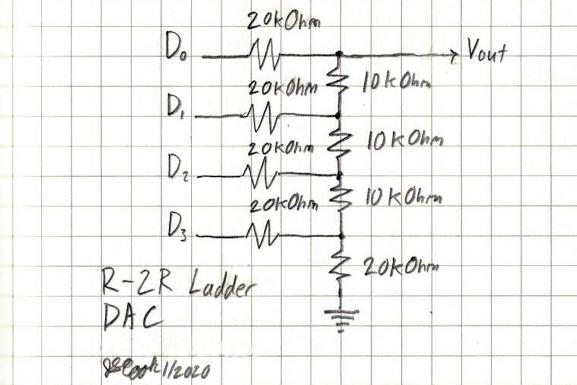
Caption: Sketch of the R-2R DAC. Note that resistance values may change, but the R-2R ratio between values will remain constant.
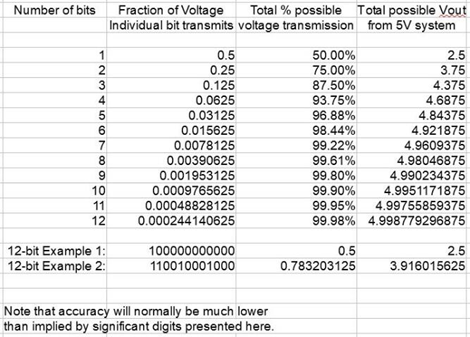
The math behind this ladder works out to a geometric series, where the first output/bit transmits half the input voltage, the second transmits a quarter, and the third transmits an eighth. As you can see in the chart below, a few outputs will diminish your input voltage significantly. But by the time you get to eight bits, the maximum output should be within half a percent of your input value. You can then combine these outputs as needed to create different voltages.
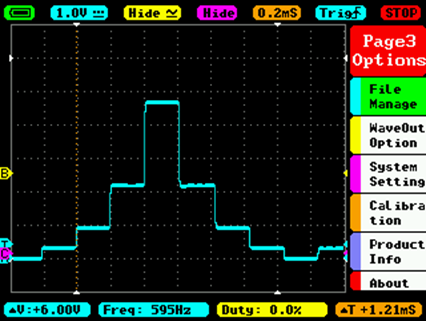
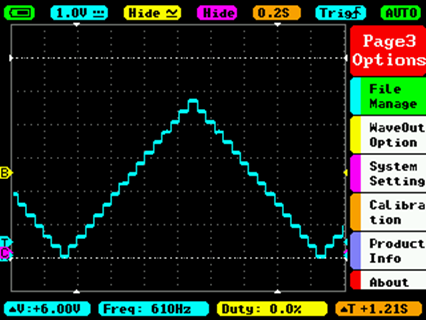
The image below shows a simple example of this resistor ladder DAC. The first turns on each bit progressively, producing a larger and larger jump between each state. The second turns on each ladder bit in a binary sequence to produce a triangle wave. You can find the code for each routine on GitHub.
The four-bit resolution renders these results a bit choppy, but the effect is much different than the PWM square wave we showed earlier. If the first pattern looks familiar, that's because it's based on the LED chaser/Larson Scanner/Cylon code.
Purchasing a DAC R-2R Ladder Module: An Easier Solution
A DIY DAC is a fun and informative experiment, but you can also buy a DAC chip, such as the 12-bit MCP4725 unit―available for under $1.00 or with a breakout board for around $5.00. The breakout I used includes I2C communication, making it well-suited to use with an Arduino project and any number of other accessories on the same bus. Follow these steps to set up your DAC module:
1. Hook up the circuit as shown in the first image on this post, with power, ground, and SCL/SDA pins, along with an output to measure the results.
2. Install the Adafruit_MCP4725 library manually or via the Arduino Library Manager.
3. Navigate to Examples, then Adafruit MCP4725, and load up the program "trianglewave."
4. Send the program to your Arduino board.
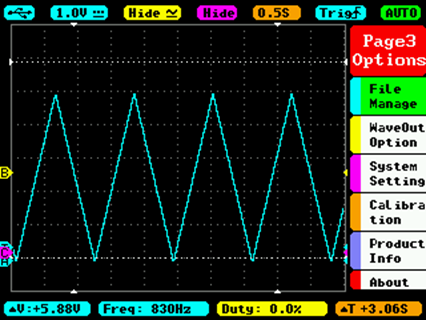
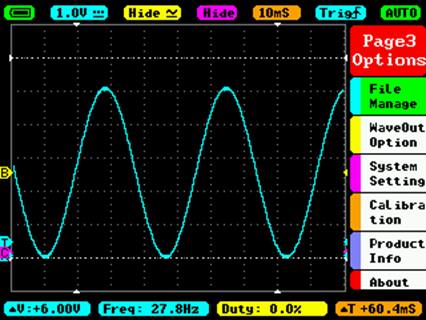
5. You can also load in the second "sinewave" example; these two sketches produced the following on my oscilloscope:
Arduino DAC for Your Project
The best solution for your application may be to buy an Arduino board that comes equipped with the proper analog outputs. On the other hand, you don't always know what you're dealing with at the beginning of a project, and background information never hurts. Whether you make your own DAC for a specialized application or implement a purchased unit, understanding this tech is one more tool to add to your mental toolbox.


